Setting up the Chart It Tool for Instructors
A comprehensive guide for instructors to setup the Chart It tool with step by step instructions
I: Create a New Assignment
Step 1: Create an Assignment in the LMS
- In the course, create a new assignment.
- Enter the assignment details.

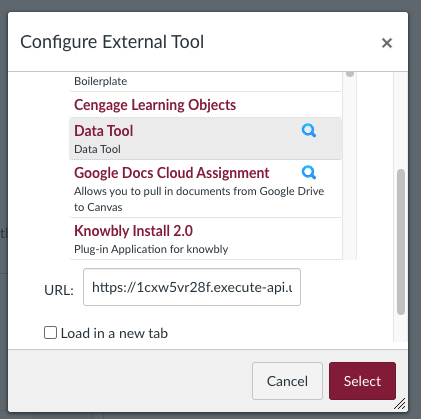
Step 2: Launch the tool
- In the Configure External Tool popup window, scroll down and select: Chart It.
- The tool, Chart It, will open in a popup window. Wait for the tool to load. You can expand the popup by grabbing and dragging the bottom right corner. This is where you will create the assignment in Chart It that will connect to the LMS.

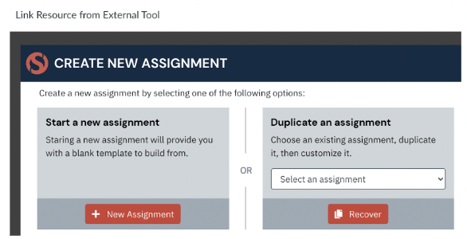
Step 3: Create a new assignment
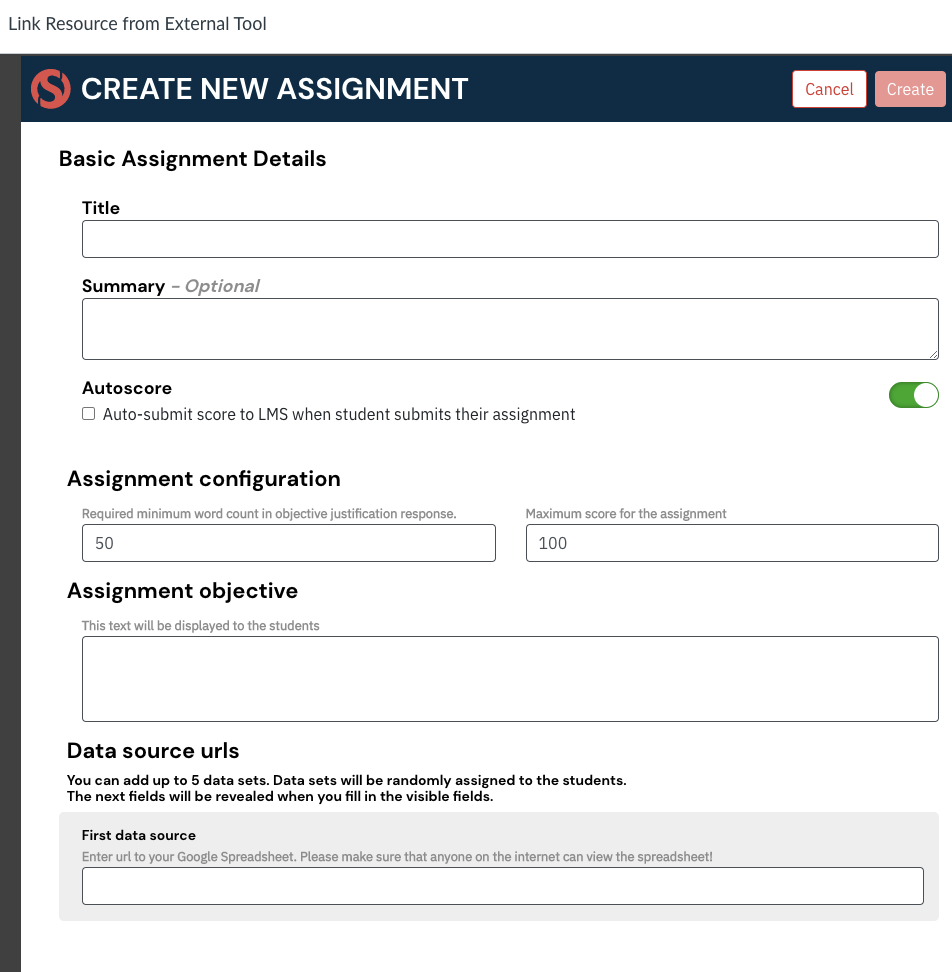
- Create a new assignment by selecting + New Assignment, and give the assignment a title and summary (optional).
Step 4: Choose grading options
- Choose a scoring method (either autoscore on or off.) Choosing autoscore will allow the tool to assess the information provided by the learner and automatically provide a score to the gradebook in the LMS. Turning off this option will require manual grading within the LMS.
- Use the Autoscore toggle to turn on or off. When the toggle is green it is on. Auto Scoring is done by the tool and the score for the assignment can be accessed by the instructor within the tool when the assignment is completed by the students.
- Choose to check or uncheck the Auto-submit score to the LMS box as well. When checked, the autoscore will display in the Canvas gradebook column associated with the Canvas assignment you have created.
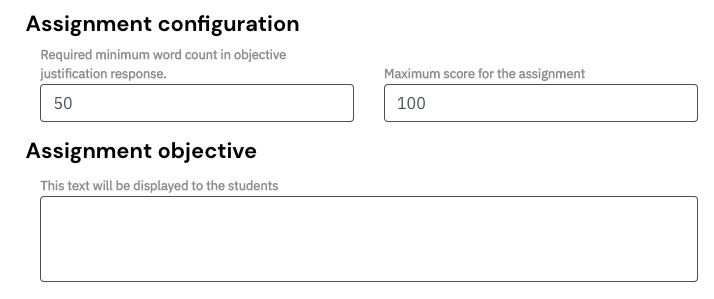
- If autoscore is on, set the maximum score and required minimum word count.

Step 5: Add assignment details
- Add in the assignment objective. This will be what you want students to achieve by manipulating the graph. An example would be “Manipulate the graph so it most accurately represents the data”.
- Add in the URL to the Google Sheet that contains the data. You can add up to 5 data sets. Data sets will be randomly assigned to the students.
- Make sure that the sheet’s sharing setting is viewable to anyone on the internet, otherwise the tool will not be able to access it!
- Select the Create button at the top of the window.
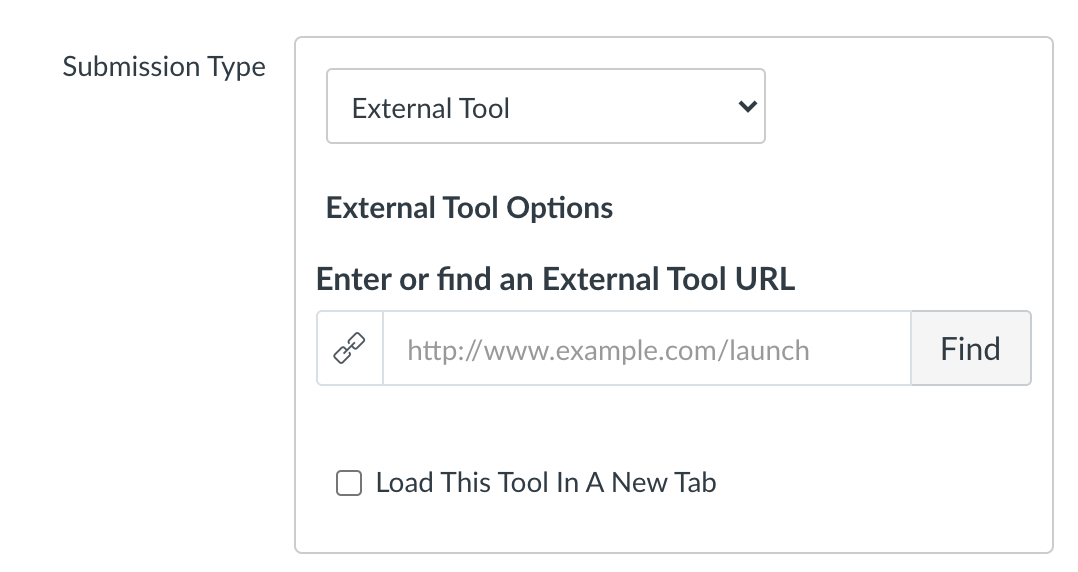
Step 6: Confirm the tool
- Then the Chart It window will close and you will see a short “successfully registered assignment” message at the top of the screen. Underneath, you will see the LMS popup with the “Chart It” selection. There should now be a URL filled in at the bottom of this pop-up screen.
- NOTE: It is recommended to check the box for “Load this tool in a new tab” for best student experience.
- Create the assignment by clicking Select.
Step 7: Publish the assignment
- Scroll to the bottom of the screen on the assignment page in Canvas and click Save & Publish to fully publish the assignment and make it visible to students.

Step 8: Review the assignment
- Review the student experience by entering Student View (a pair of glasses in the top right corner of the Canvas LMS.)

II: Duplicate an assignment previously made in Chart It
Step 1: Create an Assignment in the LMS
- In the course, create a new assignment.
- Enter the assignment details.

Step 2: Launch the tool
- In the Configure External Tool popup window, scroll down and select: Chart It.
- The tool, Chart It, will open in a popup window. Wait for the tool to load. You can expand the popup by grabbing and dragging the bottom right corner. This is where you will create the assignment in Chart It that will connect to the LMS.


Step 3: Duplicate an assignment
- You have now launched the external tool, Chart It, in a popup window. This is where you will create the assignment in the external tool. To continue, grab the bottom right corner of this popup window to expand it so you have more room to work within Chart It.
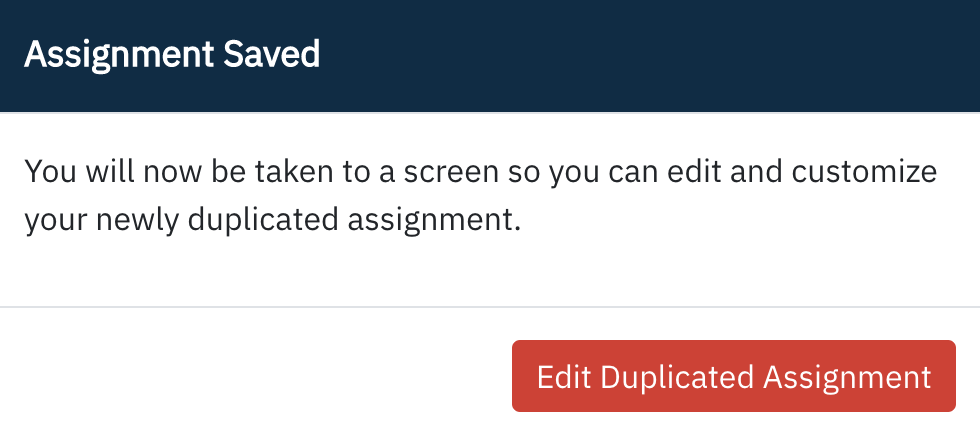
- From the Duplicate an assignment section, select an assignment you previously made in the dropdown, then click Recover (Duplicate.)

Step 4: Edit the assignment
- Click Edit Duplicated Assignment.
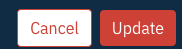
- Edit the assignment.
- Click Update to save.
Step 5: Confirm the tool
- Select the Create button at the top of the window.
- Then the Chart It window will close and you will see a short “successfully registered assignment” message at the top of the screen. Underneath, you will see the LMS popup with the “Chart It” selection. There should now be a URL filled in at the bottom of this pop-up screen.
- NOTE: It is recommended to check the box for “Load this tool in a new tab” for best student experience.
- Create the assignment by clicking Select.
Step 6: Publish the assignment
- Scroll to the bottom of the screen on the assignment page in Canvas and click Save & Publish to fully publish the assignment and make it visible to students.
Step 7: Review the assignment
- Review the student experience by entering Student View (a pair of glasses in the top right corner of the Canvas LMS.)
III: Editing Assignments
- Select the assignment you would like to edit.
- In the Chart It window, select Edit.
- Make changes to the assignment (if students have already submitted, then some options are limited.)
- Click Update to save and return.
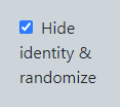
- Here you can also choose to hide the identity of the student’s who have submitted assignments and randomize for peer review or TA grading.

IV: Grading Assignments
- The tool dashboard displays student progress.
- Sort by name, score, and progress level.
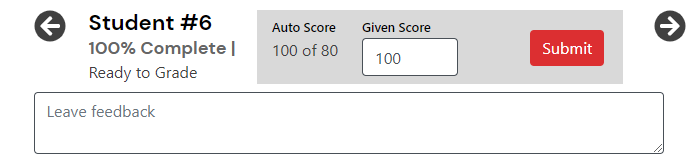
- If the autoscore option is selected, this area allows a manual override of those scores.
- The number of students viewed per page can be adjusted in the top right.


- Check the Hide identity & randomize box to switch between student names and randomized hidden identities anytime.
- To grade student work, click on the name in the student column to see their assignment. At the top of the page, there will be space to add feedback and a score. Click Submit and then the left or right arrow to move to the next student. Return to the dashboard using the arrow at the top of the page.
V: Batch Submit Student Scores
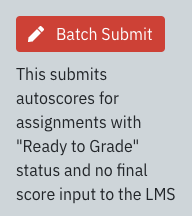
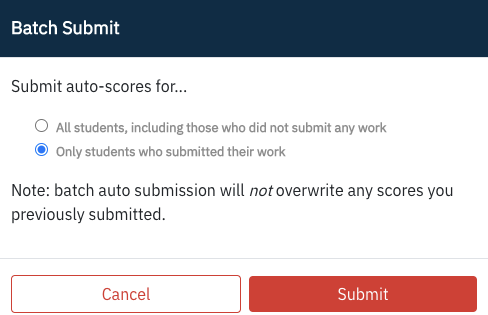
- To export student scores from the tool to the LMS gradebook, click the Batch Submit button.
- Choose between submitting scores for all students or only students who have submitted their work.
- Wait for the tool to process the grades.
- Go to the gradebook in the LMS and see the scores in the associated grade column.
VII: How Do I Create an Assignment with Chart It in Blackboard?
- Go to the course and make sure the edit mode is on.
- Click Content in the left pane. From Build Content, select the tool from the dropdown.
- Create the assignment as directed in “Create a New Assignment” steps 3 through 5.