How to integrate Inspark OER tools in Canvas LMS
Instructions on integrating Inspark OER tools inside your Canvas LMS
Overview:
The Canvas LMS requires the installation of a Developer Key. This Developer Key creates an identifier known as a Client ID. The combination of the client id and the tool's public key is used to establish a trusted relationship with between the tool and the consumer (in this case IllumiDesk and the Canvas LMS, respectively).
These steps are usually completed by the LMS's administrator.
For Tour It
1. Add a new LTI developer key and then configure the tool with these URLs in the setup.
- Key Name: Tour It
- Method: Enter URL
- Redirect URLs: https://tourit.etx.asu.edu/lti
- JSON URL: https://tourit.etx.asu.edu/lti.json
2. You will get a client_id that Canvas assigns. Email the client ID and the URL for your Canvas instance to lucien.kahn@inspark.education and gbruce@asu.edu so we can activate your LMS LTI with Tour It.
3. We will reply when your LMS instance has been registered with Tour It. At this point you may create a test assignment to verify the integration was successful. Instructor-facing setup instructions can be found here: Tour It LMS Reference Guide Fall 21
For Chart It, Plan It, Review It
Create the Developer Key with URL Configuration Option
The URL Configuration option is a JSON file that contains the application's configuration settings as well as the JSON Web Key (JWK). The JWK is a public key that is used to verify signed requests from the tool.
IMPORTANT: Please refrain from using the Manual option to create a new Developer Key. There have been reports of SameSite cookie errors with the latest browser versions.
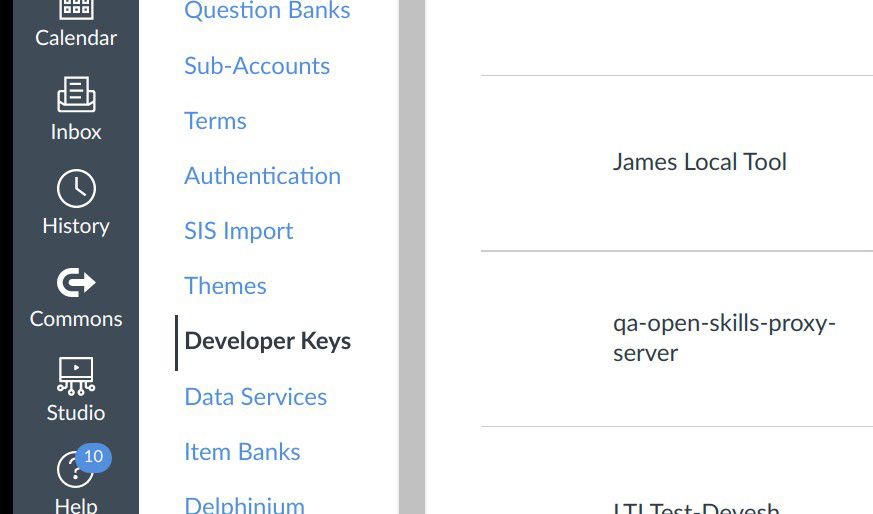
- Navigate to Admin → Developer Keys:
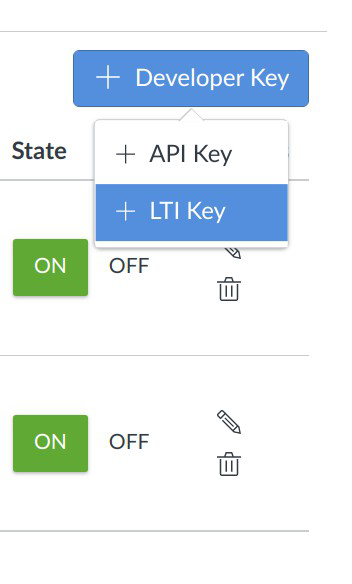
- Click on the + Developer Key button and select the + LTI Key option:
- In Key Settings, select Method → Enter URL and copy/paste the LTI 1.3 configuration link of the Inspark OER Tool You wish to install:
• Inspark OER Chart It Tool: https://openskills-canvas-configs.s3.us-west-2.amazonaws.com/chart-it.json
• Inspark OER Review It Tool: https://openskills-canvas-configs.s3.us-west-2.amazonaws.com/review-it.json
• Inspark OER Plan It Tool: https://openskills-canvas-configs.s3.us-west-2.amazonaws.com/plan-it.json
NOTE: At this time Canvas does not support filling in the four fields on the left of the screen from the json file. - Populate the Key Name and Owner Email fields:
• Key Name is the name you will see in the Admin Screens where LTI keys are listed.
• Owner Email is a contact email so if there are issues with the tool there is someone to contact.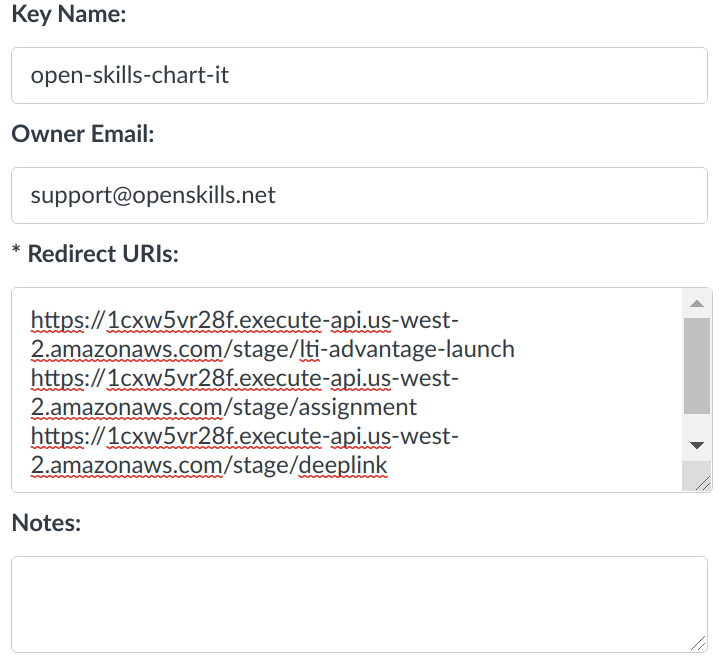
- Populate the Redirect URIs field with the following:
https://1cxw5vr28f.execute-api.us-west-2.amazonaws.com/stage/lti-advantage-launch
https://1cxw5vr28f.execute-api.us-west-2.amazonaws.com/stage/assignment
https://1cxw5vr28f.execute-api.us-west-2.amazonaws.com/stage/deeplink
NOTE: Separate the values in the Redirect URIs field with a new line/return, not with commas. These values are the same for ALL Open Skills Tools. - Click the Save button to save the configuration.
- Record the value in the Account → Details column of the Developer Keys page. You will need this value, known as the Client ID, to complete installation of the OpenSkills application for your institution.

Add Application to Course
With the Client ID in hand, navigate to Settings where you will activate the OpenSkills Tool.
- Navigate to Admin → Settings
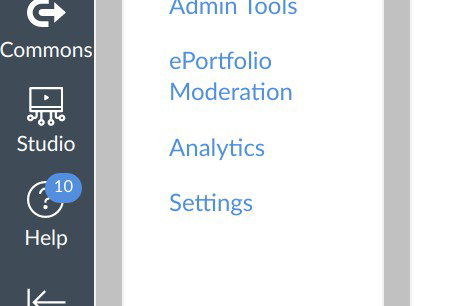
- Select the Apps tab.

- Click on the View App Configurations button.
- Click on the + Add button.
- Select the By Client ID from the Configuration Type dropdown menu.
- Populate the Client ID field ID obtained from step 7 in the Developers Keys section.
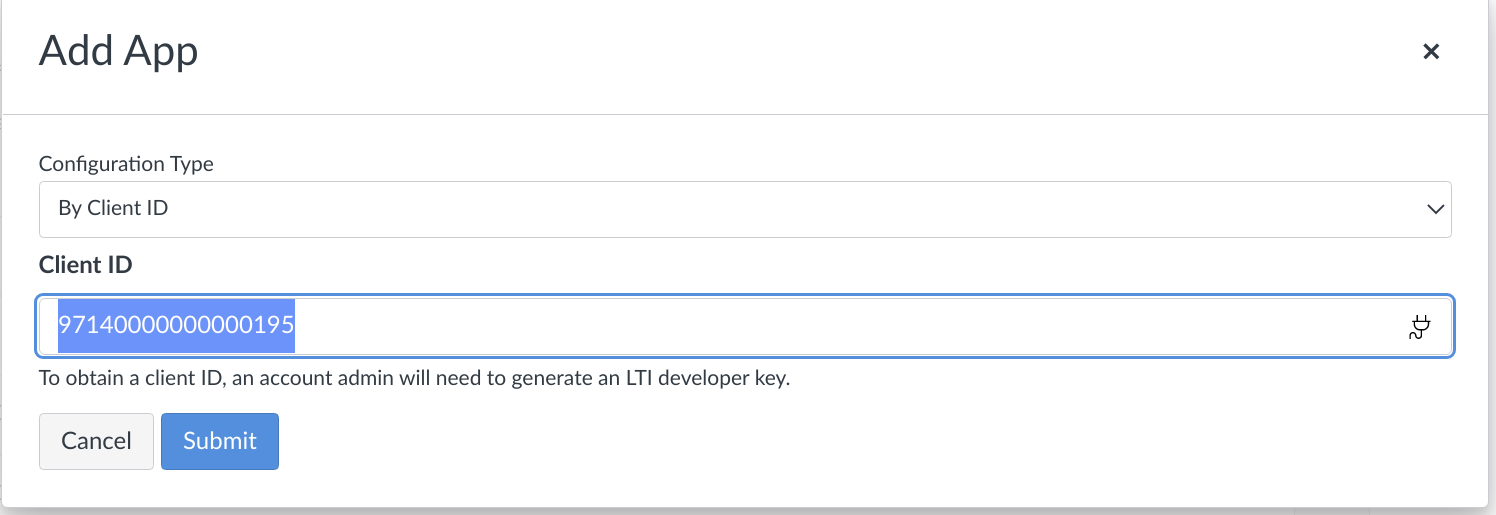
- Click on the Submit button to add the tool.
You must send to INSPARK OER the client ID and the deployment Id.
The client_id you have from previous steps. Follow these steps to obtain the deployment Id:
- Find your app in the Settings → App → External Tool list:

- Click on the Settings Icon on the right of the list.
- Select and copy the Deployment Id:

Contact the Inspark OER support team (lucien.kahn@inspark.education) and give them the following information:
• Inspark OER Tools installed ( Chart-It, Review-It, Plan-It)
• Your institution
• Contact's email address once the tool has been configured by the open skills support team
• Client Id: example: 97140000000000241
• Deployment Id: example: 476:5440a08422ab1ee7794a0588b5e4cb4a094c4256
That’s it. The support team will be in contact with you once your tool is live.